I used to be a certified asbestos remover in Europe, where we have pretty stringent asbestos removal laws.
Usually it's only legal for a person to remove things alone under a certain quantity(3 big sheets of roofing for example) but at a certain volume or with certain materials(cloth, prone to breaking/turning to dust) you're required to hire a company who will do it per procedure.
Let's say you're somewhere where you will get a permit. You will need non tear holding bags marked with that the contents contain asbestos, this is not per se for you but for future generations that might find the bags and get warned about the contents.
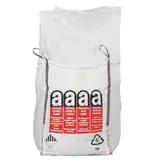
Then, have non tear transparent bags that are also marked that they contain asbestos content

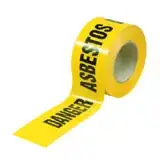
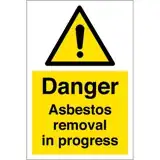
Then you need to cordon off the area where you'll be removing asbestos with asbestos marked tape and place signs that warn about the asbstos all around the area. Only asbestos removes in full asbestos removal gear may enter this area until the project is completed.
When you remove the tiles, if they have sharp corners you need to duct tape those corners so they won't pierce the bag side when the bag is lifted.
If the bag is pierced you must wrap it in a new bag.
If there is high risk of piercing you should start out with double bagging.
Do not forget to duct tape sharp corners that could potentially pierce a bag wall.
When the bag is full enough but under the 20kg limit so it can be handled safely without back injury twist the top end close. Then use a zip tie or duct tape to close it up.
Snake it back so the rest of the plastic that's above the duct tape/zip tie is on the side of the duct tape then duct tape it again, making sure all exit openings are covered and no air can escape.
Put the bag carefully in the big asbestos bag to prevent tearing of already present bags, breaking of tiles, etc..
About the tiles, be very careful about removing the nails. If a tong even chips/chafes a tile a little bit when removing the nail you're releasing asbestos fibers into the wind through your entire downwind neighborhood.
You will need to clean the beams of any dust residue and you will need to drill out all the nail holes and gather the wood you drilled out as asbestos contaminated material.
If you have the possibility to cover the entire house with a tent, make sure you build a negative pressure tent, with an asbestos filter equipped fan, that sucks the air out of the tent so that if a hole appears in the tent, the negative pressure will prevent asbestos escaping.
When you are done for the day, cover the fan with the lid or plastic and duct tape it closed before turning the fan off.
Patch any holes immediately with duct tape that you also fixate with heavy duty spray can glue because duct tape on it's own is not adhesive enough on a plastic surface.
For the transporting asbestos out of the hazard zone you need to build a special sluice room where the bags can be washed down before being removed from the zone.
Asbestos worker places bags into sluice and washes down bag. Worker closes sluice and worker from uitside opens sluice. Washes down bag again, and transports it to the big holder bag.
When done with the project wash the insides of the tent and all surfaces carefully with a wet cloth. Be liberal with water. Make sure all dust is gone. Throw the towels and buckets away as asbestos contaminated materials.
Any tools you used and do not plan to use for other asbestos projects need to be disposed off as asbestos material. If you plan to reuse them you need to seal them in an airtight container that you close off with duct tape.
Wrap up the fan inlet so it cannot release asbestos fibers.
Have a testing labratory come by to test your tent. If they give the ok clear, wrap up the tent and pack it up as asbestos containing material.
Make sure you closed up your asbestos containing white bags carefully with liberal use of duct tape and heavy duty spray can glue to make sure no air can escape.
Bring the bags to a asbestos deposit point(usually a big hole in the ground specially reserved for asbestos dumping)
Also, hire a asbestos changing cabin that has three sections.
Dressing room. This is where you undress from your normal clothes and put on throwaway clothes(underwear, t-shirt, socks)
Showers. This is where you thouroughly shower every inch of your body when done.
Suit zone. This is where you don your asbestos removal kit. A fresh white asbestos removal coverall. A face breathing mask with asbestos filters(Don't skimp on the filters otherwise you can just go in without mask) and asbestos removal work boots with iron noses, work gloves. Tape off with duct tape all the edges between suit and face mask, tape off between suit and gloves, tape off between suit and boots. No air may enter. Tape up your zipper too, all the way.
When you're done for the day, in this cabin too,take off the suit and put it in an asbestos removal bag, DO NOT REMOVE YOUR FACE MASK OR PUMP during this procedure. Take off the gloves and put it in the bag, take off your clothes and put it in the bag. You should be naked now except for the air pump. Turn off the air pump, keep the mask on.
Go to the shower cabin and wet yourself and the outside face mask and pump thoroughly.
Screw the filter cap from the pump and wet the filter thoughtfully so it's soaked. Remove from the filter and throw it in the asbestos bag in the previous room.
Remove mask and was the inside of the mask and the edges thoroughly, wash away any traces of dust.
Hang up pump and mask to dry, wash yourself throughly, under nails, hair, ears, genitals, between toes, everywhere with soap and water for 5 minutes.
Dry yourself off, Dry pump and mask with towel, dry shower with towel, throw towel into asbestos waste bag.
Now for my real advice: Pay someone the price of 10k-20k or so to remove the stuff for you in a safe way, saving you the above hassle, saving you from risking your health, and having it done in 2-3 days.


