14

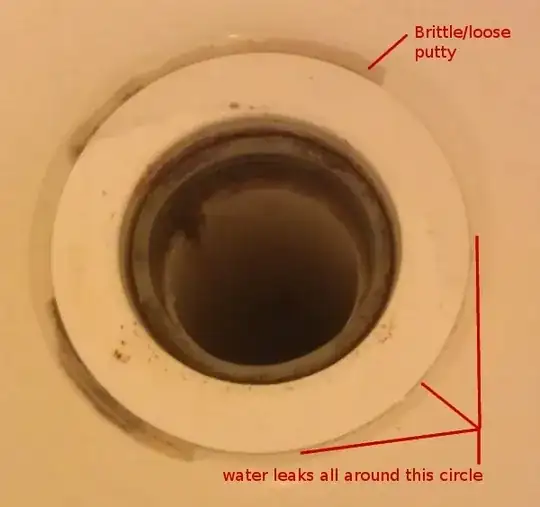
The shower drain in my first-floor bathroom leaks. Based on looking from the basement below, it seems the leak is at the point where the drain assembly should clamp to the shower base (which is pre-formed fiberglass/plastic). This is confirmed by the ability to wiggle the drain assembly a bit relative to the shower base, and by the fact that the pieces of putty that remain seem to be coming loose from on top.

So to fix this I'd like to loosen the drain from the shower base, insert new putty, and re-tighten.

Here are the views from above and below:

Looking down from shower

View up from basement

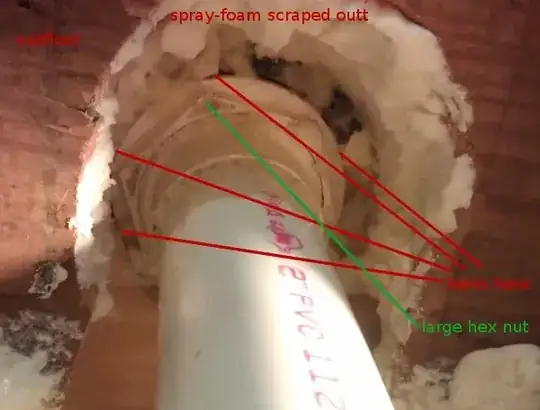
I think that what I need to do is loosen the large hex nut visible from the bottom. If I understand correctly, this should loosen the drain from the shower base, and possibly also loosen the compression fitting of the drain around the PVC drain pipe.

Unfortunately, I don't seem to be able to get the nut to budge! Because it is only reachable through the hole in the subfloor, I can't really get a normal wrench around it. Trying to move it with my hands or with screwdrivers inserted into the slots in the nut doesn't seem to work either. Maybe the nut was made harder to move by use of PVC cement, or the spray foam that used to fill this area.

So, how can I move this nut so I can reseal the drain?

Shimon Rura
  • 8,312
  • 6
  • 31
  • 46

4 Answers4

4

Don't bother trying remove the drain. Don't try to renew the putty, you'll just have the same problem again.

Remove all the old putty you can. Roughen the surfaces that contacted the putty with coarse sandpaper. Clean the shower base and drain surfaces where the putty was a well as you can. Fill the resulting gap with self-leveling polyurethane sealant. Do so in a way to not trap air and to fully fill the void. Once that stuff cures, it'll never leak again!

If you do have to remove the drain in the future, simply cut thru the sealant with a sharp knife.

bcworkz
  • 11,578
  • 21
  • 19
2

Sawzall is your friend.

Depending on how comfortable you are with plumbing, using a Sawzall with a fine-toothed blade and some steady hands should allow you to cut the nut on either side and then bust it off with a chisel and hammer.

This obviously implies destruction of the drain; so it will have to be replaced. The primary bit to preserve is the shower enclosure itself.

ericx
  • 159
  • 6
0

This video was very helpful to me, because starting at 1:13 is shows the instructions for removing an old shower-drain from a pre-formed shower using a hand saw.

https://youtu.be/xoUxzuE3XcE?t=73

(The rest of the video is an advertisement for a drain designed for pre-formed shower-pans.)

0

Removed grout from top. Applied heat gun to soften PVC, above and below a few times and tap, tap, tapped it out.

Used Dremel like tool to etch out above to fit new drain piece. Now nervously about to fit and seal in place. A lot of work but less than replacing the full shower base.

ThreePhaseEel
  • 87,685
  • 36
  • 144
  • 243