I would suggest your butt joint, reinforced by dowels, to help keep the boards flat.
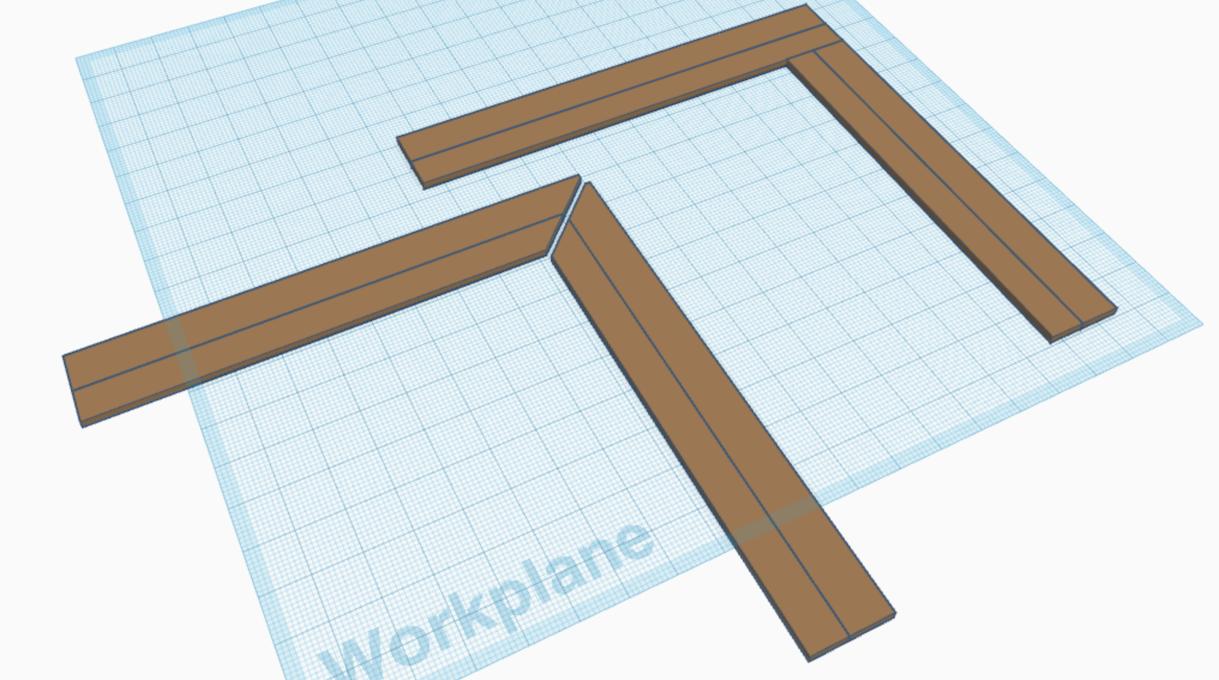
After a good night's sleep, I realize that was terribly bad advice! You do NOT want to join wood cross-grain like that, it will end up splitting boards as the wood naturally expands and contracts through the seasons. Allow the boards to meet but not be physically joined at the inside corner.
Depending on when you're building, you'll need to accommodate expansion in different ways. Generally, in the winter, wood is at its smallest because the air is dry (though here in the US Midwest, this is a rather wet week or two and wood is swelling), and in the summer it's at its largest because it is humid. If you're building when it's dry, leave a 1/4- 1/2" gap between the left-hand bench (going all the way into the corner) and the right-hand bench (ending at the left bench). This will allow room for the left bench to expand to meet the right bench without getting jammed up and twisting. If it's been very humid for several weeks, you can get the gap pretty close (1/16 - 1/8") because the wood will be near its maximum width.
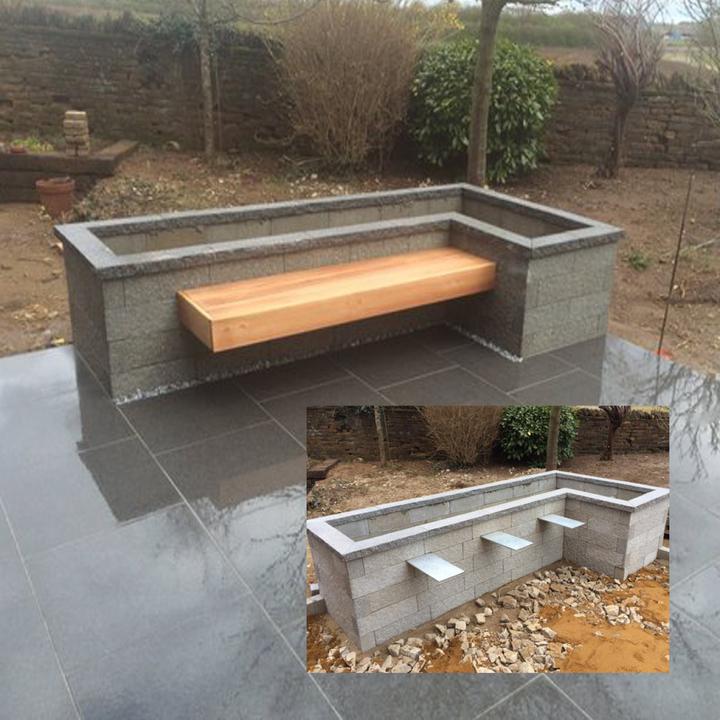
You'll also want to make oval holes/slots in your steel supports through which you're driving screws to hold the bench down. This will allow the wood to expand & contract (making each bench deeper from the wall or shallower) without tearing out the screws or warping. Please see this answer for a lot more info on wood expansion and how to build to accommodate it.
On further reflection, the following information is still valid. It is safe to join the boards along the long grain, because that's not the direction that wood expands by any significant amount.
I would also suggest that you dowel or pocket screw the long joints as well, to help prevent cupping. It appears that you're planning on having the boards butted against each other (there doesn't appear to be any space between them in your drawing). If you do this, be sure to:
- Ensure the edges of the boards are jointed nice and flat so you get a good, tight glue joint
- Alternate the growth ring pattern (one board cupped up, the other cupped down) to help counteract warping.
- As suggestion, dowel these joints as well as an additional defense against warping.
Once you've got the base of the bench built, put the decking on top in whatever pattern appeals to you. You could miter it or make a butt joint, make a herringbone pattern, whatever - this stuff is just the set dressing.
Note: Be sure that you do not attach the decking cross-grain. If, for example, you do a miter joint, where the right-bench pieces overlap the left-bench, do not attach them to the left-bench. Instead, leave them free floating above the left-bench so the solid wood underneath can move without tearing things apart.
If you're using actual decking material, it will add a fair amount of additional strength to your bench, since it's designed to be walked on (though supported on 16" centers, not 28"). If the decking is screwed down to the substrate the same way it would be screwed down to deck joists, having it cross the inside corner in a different pattern than the 2x10s would add some extra strength there. Again, do not attach it cross-grain.
Do be sure to use pressure treated 2x10s for this outdoor work. I wouldn't rely on the decking on top to keep the wood dry underneath, and you've got an ideal spot for snow (if you get any) to swirl and drift up underneath the bench soaking the bottom side, too.