3

I assembled this bookshelf from Ikea, and it is unstable - the top part can move left and right.

enter image description here

This remains so when I put the inner shelves in place, so I fear they might be unstable too. I verified that all screws and nails are tight. What more can I do to stabilize this bookshelf?

enter image description here

Here is a close-up of the dowel (I loosened it a bit to take the picture; the problem remains even when I tighten it back).

enter image description here

blahdiblah
  • 127
  • 2
Erel Segal-Halevi
  • 387
  • 2
  • 6
  • 16

8 Answers8

22

That back panel is not decorative, it is a vital part of the structural integrity of the whole cabinet. Have you actually nailed it in? It is fiddly to do so, but it is what is supposed to stop the wobbling.

15

It looks like you may have damaged the side panel here:

snip of original picture highlighting area of damage

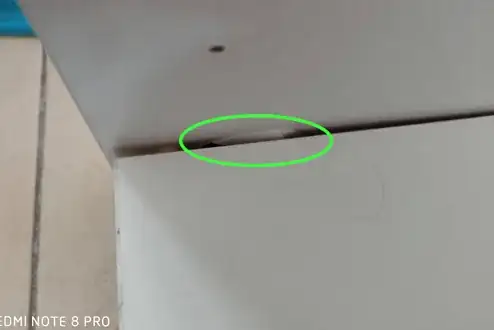
That may make it difficult to tighten the side panel to the bottom shelf and leave the whole thing a little wobbly.

If you're very careful, you should be able to remove the nails from the cardboard backing without causing significant damage to the cardboard. I've done this before a couple of times. Even if you damage it a bit removing one or two nails, you can still reuse it. I usually pry the nail up with a small screwdriver before getting the claws of a hammer underneath to pry the nail out. Be sure to keep the hammer head along the edge of the wood, otherwise, you'll end up pushing a big hole through the cardboard backing and that's not good.

Once you've got the cardboard off the back, release the cam-locks so you can remove this side panel. Take a look at the damaged area here - you may be able to flatten this area by reassembling and hitting the outside (gently at first, harder as necessary) with a rubber mallet to flatten it down. You might be able to smash it back into place by directly hitting the bulge with a mallet, or squeezing it in a clamp.

Alternatively, so long as there isn't an assembly hole in this area, you could get away with chipping the bulged out area away so the two boards can sit tight together.

No, the vertical board won't be quite the same any more, but it's unlikely to cause any significant, long-term structural damage, even if this is a wall hanging cabinet.

Once you've reduced the bulge by pretty much any means necessary, reassemble the cabinet, make sure the cam locks are good and tight, especially in this area. Square the cabinet up and nail the back on again. If you damaged any spots in the cardboard, just avoid putting nails back in those areas. They give you more than enough nails to securely hold the back on and provide structural integrity, so even if you leave a couple out you'll be fine.

If you'd like, you could glue the dowels in by putting a couple of drops of any standard woodworking glue into the dowel holes then inserting the wooden dowels. Some of the flat-pack furniture I've assembled has come with a little tube of glue and instructions to glue the peg into one hole. Some have instructed to glue it into both holes. Most, including those from IKEA, have no glue and no instructions to do so. As far as I can tell, all 3 methods yield reasonably similar structural rigidity. Remember that anything you glue together will be fairly permanently assembled - an important point if you ever expect to take these apart to move them. Do not bother to put any glue around the metal/plastic cam-lock pins, their threads, or the cam-locks themselves. Standard wood glue not stick to these parts very well, and this will simply be wasted time and effort.


Another option has occurred to me.

Since this appears to be a floor standing cabinet, screw a piece of 1x3" lumber (reasonably cheap at the local big-box store) to the uprights at the top back of the cabinet. Two screws inserted through pilot holes into the uprights will help stabilize the cabinet by providing a small amount of additional triangulation. However, more importantly, the solid wood will provide a good material for holding the cabinet to the studs in the wall with a couple of screws. Once it's screwed into the studs, the cabinet won't go anywhere, no matter how wobbly the construction actually is.

FreeMan
  • 48,261
  • 26
  • 101
  • 206
7

By the bulge shown in the joint, you did not have the surfaces tight when you screwed them together and damaged the joint surfaces.

Not easy to rectify that now, except by adding metal angle brackets at the corners / edges and also reducing those bulges. These brackets ac be on the inside corners and on the backside to reduce the visual impact so they are not "ugly".

Edit: To show a commenter what can be done, which does reduce the "swaying" then this is what I did in the top internal corners. One can see the damage caused by the original owner where the door hinges were pulled out - the damage to the joints is now less visible. enter image description here

Solar Mike
  • 30,038
  • 2
  • 34
  • 69
5

Attach the top to the wall with a metal bracket. That will also prevent it from falling over.

Most shelving units from Ikea come with instructions and the needed hardware for wall anchoring:

Ikea wall anchoring instructions

jpa
  • 2,371
  • 13
  • 15
2

Another inexpensive option: create an "X" behind the back panel using braided steel wire attached to screws at the corners. Tighten the wires using a turnbuckle on each diagonal. This will not add weight or greatly increase the overall dimensions but will greatly resist the "racking" you are experiencing. Pre-drilling for the screws in essential. They should be at least 2" long. Eyelet screws or hooks are a good option. All available at any hardware store.

2

That back panel seems woefully inadequate. If possible then it should be installed as outlined here. It is in essence a sheer wall which provides immense lateral strength.

enter image description here


If this is not a possibility and Ikea is truly such $hit then buy some 5mm plywood, cut it to size, and tack it on with small nails along the outside edges.

Note: if you do not have the means to cut it yourself then measure the rear of your cabinet and have a big box store cut it for you. Home Depot and Lowe's typically have one of those sliding saw apparatuses and an employee will cut it for free. You do of course have to buy the whole sheet.

4x8 foot sheet of 5mm poplar sanded plywood

MonkeyZeus
  • 17,328
  • 2
  • 27
  • 64
0

Probably the best is to Glue it!

All around, using wood glue. To ensure proper adhesion roughen the portion where glued with sand paper. Also be aware that the rough/cut side will absorb lots of glue (due its porosity) so apply generously.

If you are planning using any kind of metal brackets, know that is a low density particle boards about 1/2" to 5/8" thick, and screws wont hold in it. You need to use bolts.

After gluing, you will not be able to disassemble if you decide to move it with you to another home.

The actual problem is the back wall--it just slides in and it is not holding anything. The back-wall function is when nailed to prevent any sideways movement.

It looks like you did not nail the bottom part of the back wall.

DIY75
  • 20,686
  • 3
  • 23
  • 47
0

If repairing the blown out panel per the first part of @FreeMan's answer doesn't work to get the back tight, you can add blocks at the corners around the back panel. As others have said, that panel is the primary "anti-wobble" bit, but it's usually too thin to nail in properly. If you add small blocks at the four inside corners of the cabinet, up against the back, you can screw those to the cabinet and to the back. enter image description here

user34314
  • 161
  • 1