1

I have a Force brand boiler in the basement connected to a multi-zone baseboard system. I hear gurgling sounds in a number of the zones, and one zone doesn't reliabily heat (as of a few days ago). So I have decided to bleed the air from my system. Unfortunately, my system doesn't look like a lot of the ones I've seen youtube how-to videos. In particular, I don't see drain hose connection on the return-side of my boiler.

On the output side, I see the hot water pipe come out of the boiler and the go to the wall where it splits in to 7 zones, each with a automatic switch (connected to the room thermostat), a shut-off valve below the automatic switch and a hose-connection in between these two.

Wall with seven zone switches

On the boiler itself, I see the return pipe (black), but there is no hose connection on it.

Boiler with the return pipe (black) on left

The return pipe is black and goes straight up to the ceiling.

Full boiler system with black return pipe on right going to ceiling

In the ceiling, it seems to connect to the various zone return pipes. Ceiling view with black return pipes connecting

But the root of my problem is that I don't see a hose connection on the return side, so I don't know how to drain the air/water from it. Does this kind of system bleed out a different way? The boiler's part number is Force 08N-RHG1

For additional information, here are some photos of other parts of the system:

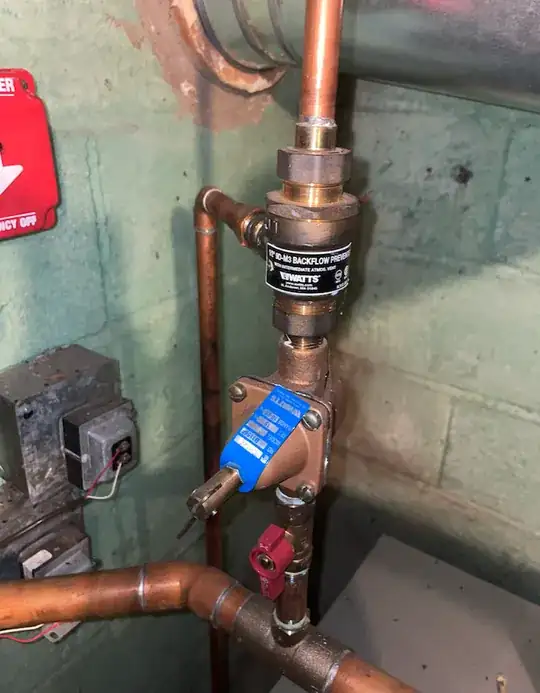
  1. I believe this is the feeder valve where fresh water can be pushed in to the system. It connects to the output pipe in between the boiler and where the various zones split off to the automatic zone switches. Feeder valve where fresh water can be added to the system

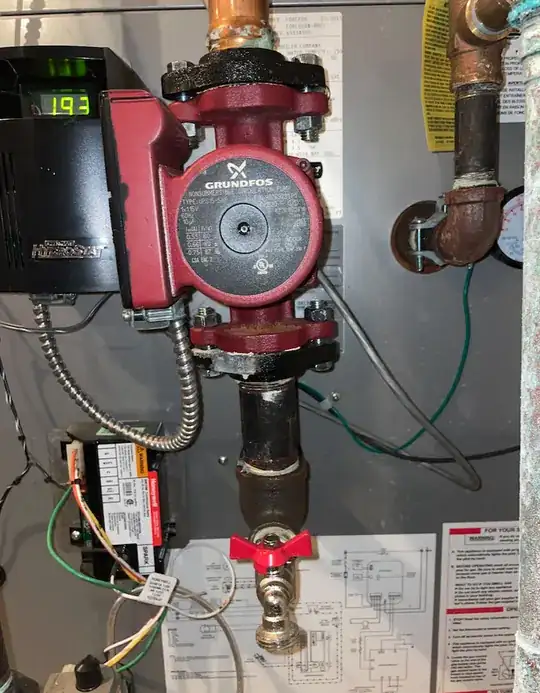
  2. Contraption on the boiler where the new hot water leaves to go to the zone splitters. enter image description here

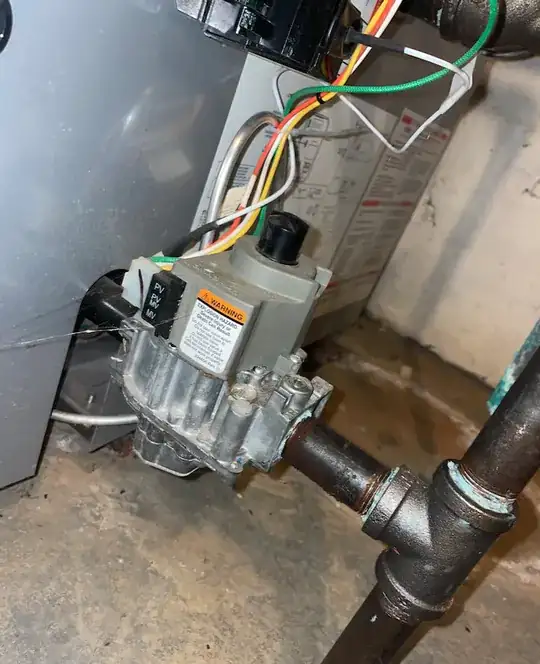
  3. Contraption on the bottom of the boiler where the old water returns. enter image description here

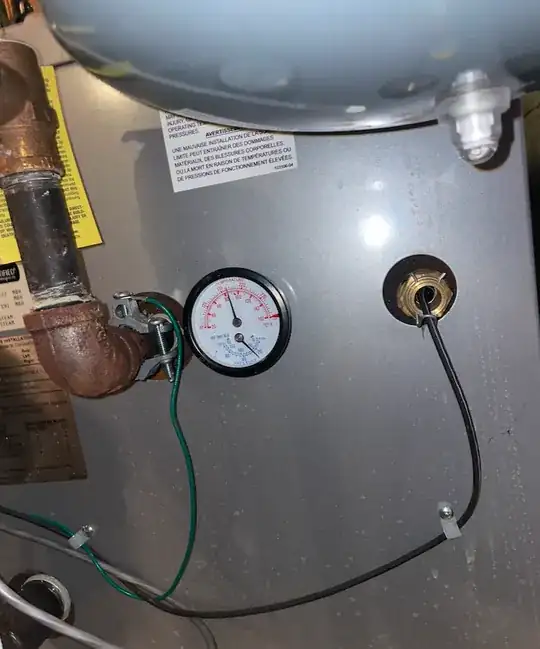
  4. PRessure gauge on the boiler enter image description here

Doug
  • 403
  • 8
  • 16

1 Answers1

2

You need a short garden hose about long enough to reach the floor from any of the 7 garden hose spigots on your 7 zones. An old washing machine supply hose would be ideal.

You also need a bucket, minimum 5 gallons.

Turn the boiler off using the switch in the red cover plate.

Close all 7 manual ball valves for the 7 zones.

Select a zone that you're going to de-air, connect a garden hose to its spigot and put the other end in the bucket. Once we start, you always want the free end of the hose to remain under water to prevent air from entering the hose and plumbing.

Now manually open the electric zone valve for that zone by pushing the lever on top of the zone valve body across its travel till it reaches a notch, and engage the lever in the notch to hold it in place. You need to use adequate force to move the lever, and it will move slowly because of gearing.

Open the water supply's ball valve above the backflow preventer and leave it open for the duration. You may get some flow if the system has lost any water.

Take note of the gauge pressure when flow stops, if there is any flow.

Now open the spigot that the hose is attached to. Water flows from your water supply regulator through the pump, through the boiler, past the expansion tank and to the upstairs, then returns to the basement through one of 7 zones, through the open electric zone valve and spigot into the bucket.

The goal is to get rapid flow of water that will carry air along at a good enough pace that the bubbles will be forced from the upper levels down into the basement, against their natural tendency to rise. You need to watch the water accumulating in the bucket and look for bubbles, which will be obvious when they appear.

You may need to open the spigot fully to get enough flow. If the flow still seems inadequate to force bubbles down the pipe into the basement, you'll need to override the water supply's pressure regulator by pulling that lever on the regulator. Use your judgment to decide how much to pull it from its resting angle, possibly all the way to straight. That will increase the pressure and flow. But use caution: keep an eye on your pressure gauge and do not allow the system pressure to go higher than about 25 psi or your pressure release may dump water on the floor.

Important: Never increase pressure manually unless a spigot is open. That means that when your bubbles appear and it's time to stop, put the pressure lever back to its original position, THEN close the spigot.

If one bucket of water doesn't give you bubbles, go for another bucket.

When that zone is done, close the electric zone valve by releasing the lever from the notch and move on to the next zone.

When you're completely done, open all 7 zone ball valves, let the pressure return to final equilibrium and turn off the water supply valve, and turn the power back on.

Note that adding new water to a sealed heating system tends to promote rust, though at this point you have little choice. If you find that you have to de-air the system frequently, you may benefit by installing bleeders upstairs.

MTA
  • 15,038
  • 1
  • 22
  • 53