The easiest option would be to run a new cable directly from the switch, up to the ceiling fixture. You'll want to either install a larger box and a new switch, or a double switch, so the light can be controlled independently.

If you're working in a home constructed of solid wood framing, you should be able to run the new cable fairly easily. Since you didn't mention where the switch is, or which way the joist run, I'll cover a few scenarios.
Wall adjacent to joists
If the switch is in the middle(ish) of the wall, and the joists are adjacent to the wall. You might get lucky, and simply going up the wall will land you in the proper joist bay.

In this situation, you'll simply have to drill a hole through the top plate, then run your cable.
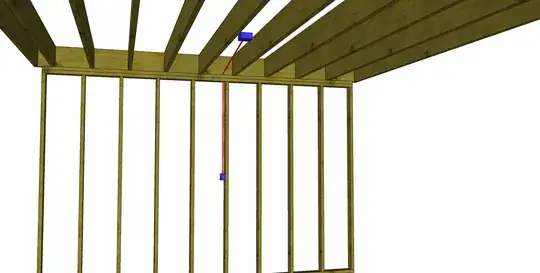
If you're not so lucky, and the switch box does not line up with the joist bay.

You'll have to bore some holes through the joists to reach the ceiling box.
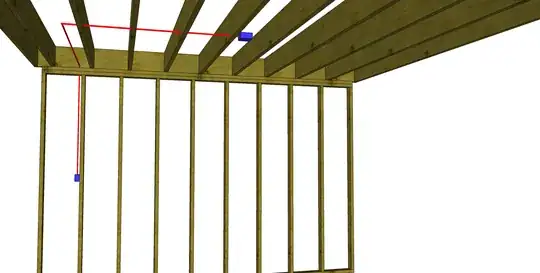
In this case you'll want to consult local building codes, to figure out where and how to bore the holes.
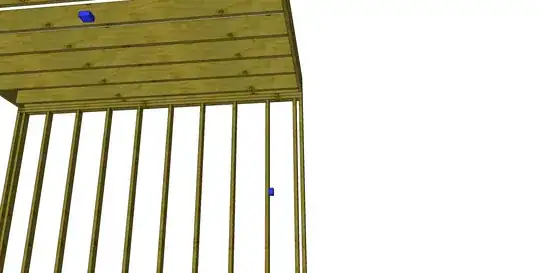
Wall parallel to joists
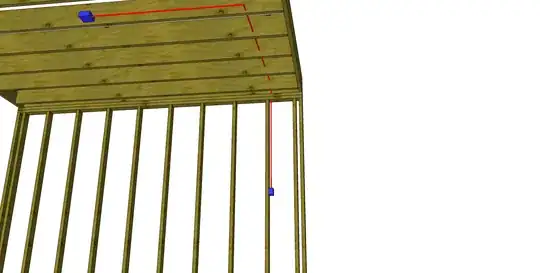
If the wall runs parallel to the joists, there's no getting around it, you're going to have to bore through the joists.
In this case it doesn't matter if you're near the middle of the wall, or to one side or the other. The procedure will be the same.


Boring the holes
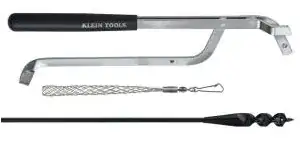
To get from the switch box to the ceiling box, you're going to have to drill through at least one structural member. However, if you have the proper tools, the damage can be minimized. To do this with the least amount of damage possible, you're going to want a flexible drill bit, extensions, and an alignment tool.
Through the top plate
To drill through the top plate, you'll need to make a hole in the finished wall. Cut a hole in the wall above the switch box, near the ceiling. Cut the hole far enough from the ceiling, so you have room to position the flexible drill bit.
Use the alignment tool to position the bit, and drill up through the top plate. Depending on the construction style, this could be a double top plate.
Through the joists
To get through the joists, you can take advantage of the hole you've cut for the ceiling box. Again use the alignment tool to position the flexible drill bit, and start drilling in a straight(ish) line towards the wall with the switch box. Add extensions as you go, to extend your reach.
Pulling the cable
Now that you have a clear path from the switch box to the ceiling fixture, you'll have to pull the cable through the wall/ceiling. Depending on how things line up, you might have to cut a few hand holes in the finished wall/ceiling to help you maneuver the cable. A fish tape might come in handy.
Future proofing and other considerations
Ceiling fans are a common upgrade, so it might be worth a little added expense now. Installing a braced ceiling box, will allow you to install a ceiling fan in the future.

Ceiling fans often come with light kits, and it's common for folks to want to control the fan and light(s) independently. Instead of installing #/2 with ground cable, you might want to install #/3 with ground. This will allow you to install one switch for the fan, and one for the light kit.
Boring vs. Notching
While you may, or may not be able to notch the joists to run the cable. Boring holes can be done with less damage to the finished material, and won't make structural engineers cringe.
WARNINGS:
Consult your local government regarding any permits that might be required. And always follow all manufacturers installations instructions, and all local building codes.
If you're working in a home that does not have solid wood members, consult local building codes for appropriate course of action.
If you try to notch the joist, you could end up with your second floor on your first floor.