Every web site said it was impossible. It is possible though, and surprising simple in theory. I successfully converted my 2006 GX470 from navigation to non-navigation with an after-market double-din stereo head unit. But, the process requires specific parts, and some specific steps. Because mine happened over almost a year, with much trial and error, I will have to update this post as I recompile it from my notes and fading recollection. These steps are specific to the 2006 (and I believe 2005 and newer) GX470, in the USA.
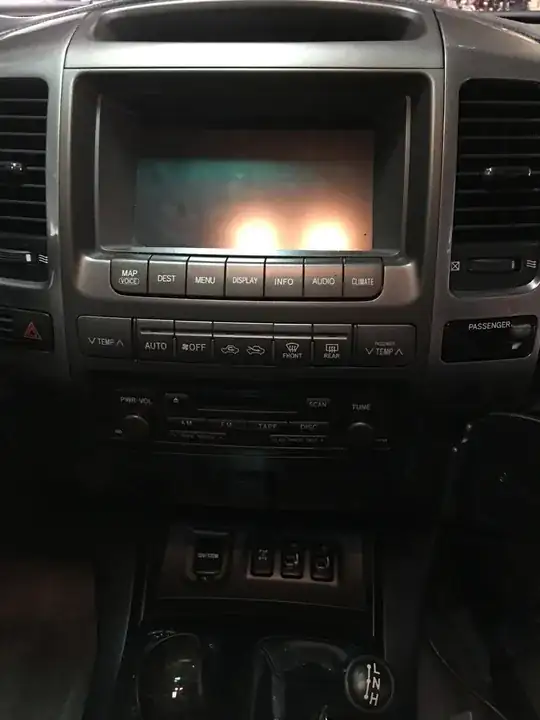
Before:
After:

Key Tools
1. Wire stripper/cutter--car audio installer grade
2. Voltmeter/Ammeter--a decent Fluke with really small modular points
3. Plastic car interior trim removal tool
4. 10mm socket with extension, phillips screwdriver
5. Spool of wire, 24 gauge(?) .
6. Label maker--to label the wires you extend (if you buy black wire to extend multiple many-colored wires).
7. Exacto knife or retractable razor blade knife--to cut back all the tape and ties retaining the wire harnesses .
Key Parts:
- 2006 HVAC control assembly part number: 55900-60832
Save yourself heartache and just buy a new one, for your exact model GX. $1300 will sound painful up front. The navigation unit controls the HVAC via the touch screen. All those signals are converted to the analog signals the non-navigation HVAC controller would normally send to the computer, heater, AC, and various motors. In 2005 the wiring changed. Don't believe all the ebay junkyard resellers telling you the 2003+ HVAC controllers will work. They look and fit the same, some of the wiring outputs are subtly very different. Taking them for granted and not precisely comparing the 2003 and 2005 wiring diagrams resulted in a solution that almost worked. Except the AC wouldn't cycle, and turned out the signal was positive where it was later negative. A royal hassle in the end. Turns out you really just need to order the 2006 (or your year) HVAC and suck up the $1300 cost. No junk yard is going to have an 05+ HVAC unit because very few were sold in the US. I tried both an 03 and 04 before I really dug in and looked at the wiring diagrams. I found https://www.lexuspartsnow.com/ to be reliable, and shipped from a dealer relatively local to my geographic area.
- Metal rails for non-navigation center dash (holds HVAC controller, radio, clock and ashtray)
Part numbers: 86212-60180, 86211-60180 (2006 as far as I know)
The navigation-model rails don't fit. Google the part numbers. Get the ones for the non-navigation GX. I recall it being kind of a guess from looking at the diagrams. It'll be obvious what's wrong if you try to fit the old ones to the new HVAC controller.
- Dash kit for non-navigation, double din:
https://www.sonicelectronix.com/item_109925_Beat-Sonic-SLA-81FB.html
(don't bother with the included wiring harness. There won't be any of the correct audio wires or harnesses around to make it work. Even if you think the harness fits, the wires are all different coming out of the MFD to the audio computer. This whole conversion process commits you to an aftermarket head unit, I believe).
Process:
Overview:
It's really not that bad in theory. In practice, it requires some serious patience. Under the passenger side kick panel are the three white connectors you need. In the non-navigation model GX they would be in the dash. In the navigation model they're way down in the front right of the cabin, plugged into the computer (which among numerous other heavy metal boxes) you can remove in the course of this process. The goal is to move those three connecters to the dash. Mostly they can be cut out of the main wire harness and delicately pulled up, except for a six or so wires. There are also two wires for the lighting that have to be spliced from a harness coming out of the MFD.
- Get the HVAC and audio wiring diagrams for your exact year GX. Get them for both the navigation and non-navigation model, here:
https://techinfo.toyota.com/
Stand by for the worst web interface of your life. If you think you created an account and it's not working, wait for a week day to talk to a human. I'm pretty sure the account creation process is manual so if you think you're going to do this on a weekend, get this account created during the week. Even then, don't use a password you use elsewhere, this site's technology seems so old, it'll surely get hacked by a bot. Some have said you have to have Internet Explorer to even get it to work. I eventually got it to work in Chrome on a Mac (I think, but at one point I had to use a Windows VM to even log into the site).
Obtain the parts.
Convince yourself this is worth it.
If you want to convince yourself this will work, plug the three white harnesses into the new heater controller (down on the floor). And start the car and see if you can control all the HVAC functions.
- Remove all the y2k technology.
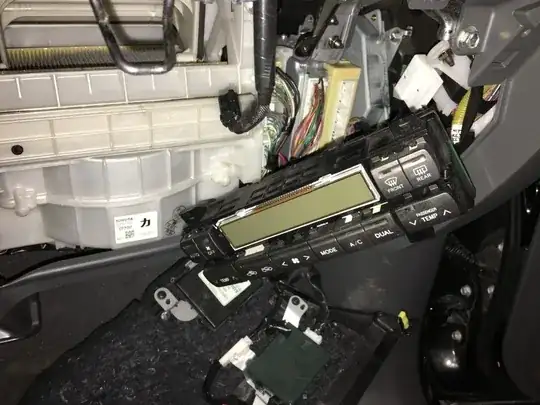
Remove the LCD. Remove the auxiliary navigation-only HVAC controller. Remove the CD changer (very helpful for accessing harness routing. Remove the analog to digital converter box (that the three white harnesses are plugged into on one side and the harnesses to the LCD (AKA multi-function display (MFD)) are plugged into on the other side. There's a second navigation computer on the other side of a rack that's more work than it's worth to remove, but will be dead weight also after this. Remove the passenger seat and pull out the multiple boxes there with the mapping DVD drive and audio-related amps and computers (navigation audio routes through the front left speaker I think, so audio wiring is all over the place).
- Relocate those three harnesses to the dash.
Warning: This is the royal pain. Everything else is not too much harder than installing your own car stereo. If you've never done that before, this may be more project than you want to attempt. The risk is you screw up the wiring going to the main computer and the car won't run right. All the wires going to that computer are bundled with the wires you're going to need to separate from them to relocate those three harnesses.
Most of the wires in the three harnesses can be painstakingly separated from the main vehicle harness running up from the kick panel, above the glove compartment, and to the center of the dash. About six (if I recall, all the same color) wires are too short. As I recall they were mostly all the same color. Potentially could all lead to the same power bus, I didn't take the chance and cut and extended all to the dash with spliced in wire.
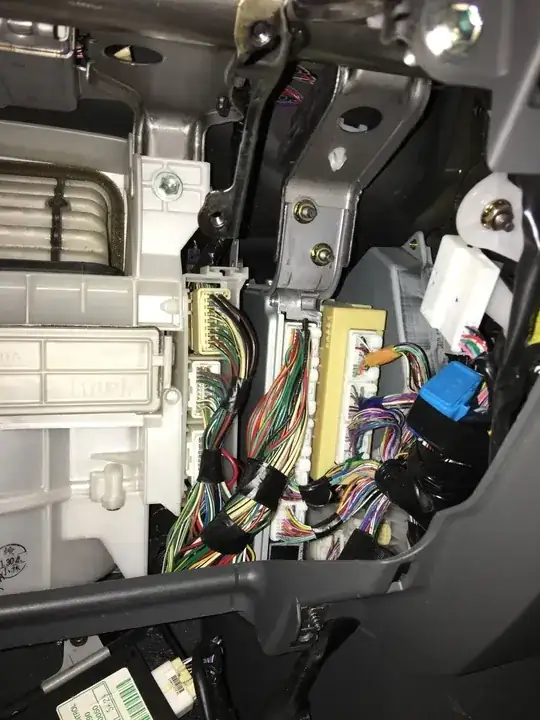
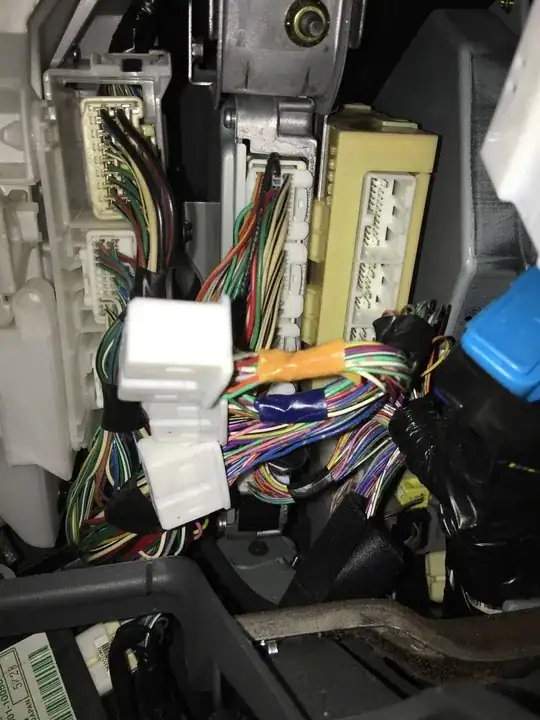
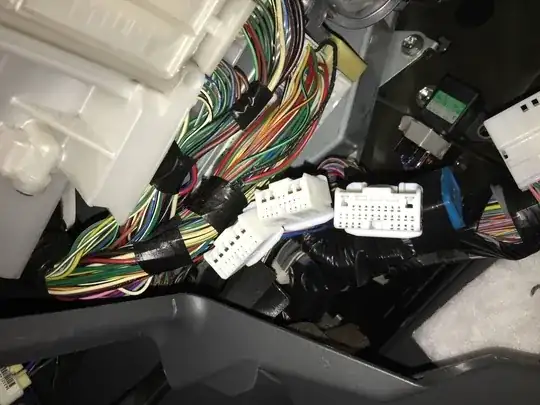
Figure out which wires won't reach to the dash. You'll need to extend them with your own wire. You'll also need to read the wiring diagram for the navigation MFD to get the illumination wires and splice them into the A13/14/15 harnesses (referencing the non-navigation wiring diagram).
Fit the new dash kit, your new double-din stereo, the stereo fit kit, and the new HVAC controller together on a work bench.
Put the car back together.
This is a first draft. I'll work flesh out details and add pictures. All audio wiring is out of scope, but easy, if slightly weird, if you've installed an aftermarket head unit or two in the past.


