14

How to drill a large clean hole in a thin melamine board so that it looks closer to this (factory predrilled, 12mm diameter):

than this (my best attempt to replicate so far):

I used masking tape, drilled with a small size drill bit first, then with a 12mm bit, and yet the result looks pretty bad. The board was already installed in a cabinet.

What's the best way to approach this task?

Update:

Below is a picture of the drill bit I used for both the pilot hole and the final one.

Johnny Baloney
  • 269
  • 2
  • 6

10 Answers10

22

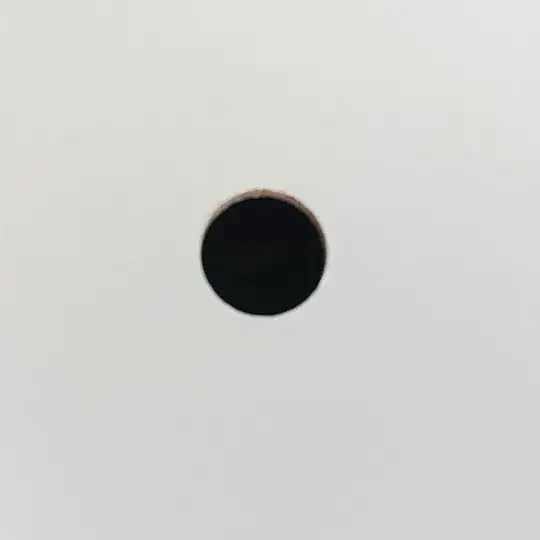
Consider how this wood is created: melamine-coated MDF is wood fibers mixed with binder and pressed into a sheet, with a plastic laminate applied to the surface. The photo seems to show that the white plastic layer has been pulled up and torn.

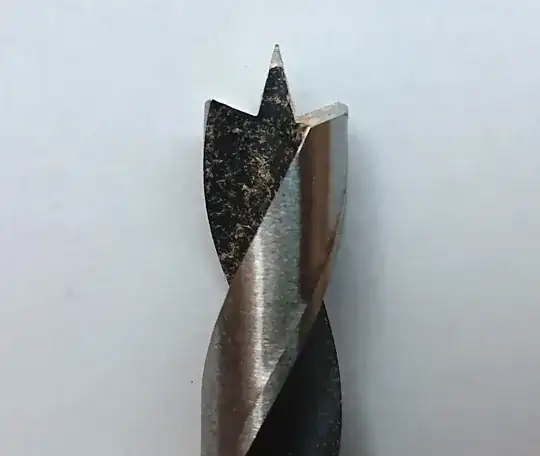
Perhaps you're using an ordinary twist drill? These are pointy (maybe sharp; maybe not) in the center and along the cutting edge but they definitely lack a sharp cutter for the outer circumference of the circle.

Other drilling/cutting tools are designed to give a very clean outer edge, particularly in soft or loose woods like MDF. Because these cut the outer edge first, tearing that occurs in the middle won't extend outside the hole.

A web search for "12 mm forstner" brings up for me several Forstner type cutters, but also brad point bits that look like they'd do a good job. These are the kinds of tools a professional or factory would use.

If you're careful and drill slowly, even a conventional hole saw or spade bit will probably leave a cleaner result than what you're getting now.

There might yet be hope for the lowly twist drill. When the masking tape trick doesn't help, firmly clamping a sacrificial scrap of wood on top of the workpiece then drilling through the assembly can reduce the potential for the workpiece surface to lift and tear.

Greg Hill
  • 35,866
  • 42
  • 91
13

As noted above, a spade bit is a good choice, as it has a circumference cutter that engages the surface first. Amazon (US) has a selection:

amazon spade bit

Image from linked side.

If the surface permits, clamping a pair of 25x50 mm planks over the desired location, one under and one over the surface, will provide for a better finish. Drill a fairly small pilot hole in the surface and a matching pilot hole in each plank.

Ensure that you are drilling square to the surface for best results.

Additionally, drill from one side until about halfway through the primary material, then use the pilot hole and drill from the opposite side.

If the back of the cabinet panel is inaccessible, consider to screw the plank to the surface and be prepared to repair the holes left behind by the screws.

This method compresses the surface being drilled and reduces the splintering. A hardwood plank is a better choice for this reason.

fred_dot_u
  • 11,958
  • 2
  • 21
  • 35
6

Wouldn't use a drill bit, per se, at all. Except the one in the centre of a hole saw. Use a 12mm hole saw in a slow drill, and it'll go through cleanly. It's also possible to saw from both sides, using the pilot hole, if you want a clean hole on both sides.

EDIT - I checked on my selection of hole saws, and only went down to 14mm. However, doing a bit of homework, it appears they're available down to 3/8" (around 10mm), obviously with a smaller diameter mandrel and drill bit. So, that's what I still recommend!

Tim
  • 5,501
  • 14
  • 31
4

Using the right bit (like a Forstner bit) and tightly clamping a sacrificial board on the other side of the board while you make the drill will make it a lot cleaner. I have done this on many projects, and it works well.

The principle of operation is obvious with respect to the clamping. Neither the particle board nor the laminate on the other side can push out if something is firmly holding it from doing so.

user4574
  • 181
  • 2
3

For that job I recommend to use Forstner Bit type

Specifically made to drill clean holes in thin material.

Regular drill has only two teeth (point of attack) so it will rip the material

Forstner Bit works by gently shaving the wood

Basically the more teeth it has the finer the drill hole

If using the incremental drill size, keep the steps to not more than 1/8 of inch increase

Found on drill

DIY75
  • 20,686
  • 3
  • 23
  • 47
2

Ideally use a forstner bit in a drill press, high speed, use low pressure and slow feed.

But I'm guessing you only have hand-held tools. and perhaps don't want to buy a forstner bit.

I can thing of two ways that will get a better result than your first effort, and one way to hide it.

A: clamp a waste piece to the back and drill slowly with a spade bit,

B: drill half-way from both sides with a spade bit.

C: don't worry about it instead fit an escutcheon onto the pipe that goes through the hole.

Jasen
  • 26,920
  • 1
  • 24
  • 46
2

In a pinch, carefully drill through until that pointy part just barely penetrates the other side and you've scored the surface. Finish the hole from the other side using the pilot hole you've made.

It's not the best solution, but I've done it when I didn't have other supplies handy.

rrauenza
  • 749
  • 1
  • 6
  • 14
1

In addition to some of the other comments, the key thing would be to fix a sacrificial piece of wood to the rear of the panel. This helps prevent blowout on the opposite side to which you're drilling.

masher
  • 111
  • 1
0

Alternatively, use one of these:-

enter image description here

You effectively start with a small hole, then enlarge it as the bit travels into the material. You don't need a drill press or tape. Stop at the 12 mm mark.

They're rated for metal so should fly through thin melamine.

Paul Uszak
  • 415
  • 4
  • 10
-2

TL;DR Use a series of bits

12mm is ~ 1/2". I am not sure of the usual sequence in metric bits. In US bits I would step by 1/16" increments:

  • 1/8"
  • 3/16"
  • 1/4"
  • 5/16"
  • 3/8"
  • 7/16"
  • 1/2"
manassehkatz-Moving 2 Codidact
  • 139,495
  • 14
  • 149
  • 386