5

I'd like to build a largish (6' x 7' x 4') structure that can be assembled and disassembled on-site with only hand tools. I'm thinking about things like insert nuts, cam lock nuts, mortise/tenon joints locked in by Ikea-style nut sleeves. But generally, I can't tell whether "disassemblable" just means "not sturdy" or "will only last for one or two assemblies."

Is this a realistic goal? Are there fittings that fit this bill, or do I have to choose between permanent and not sturdy?

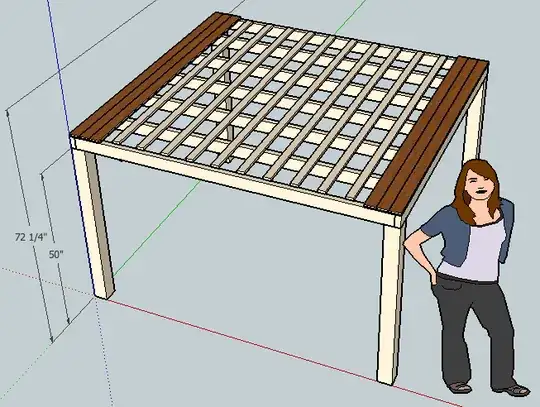
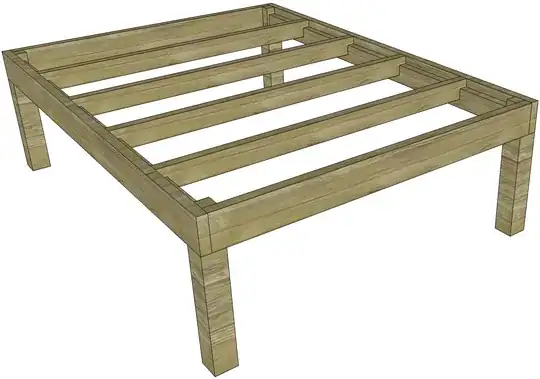
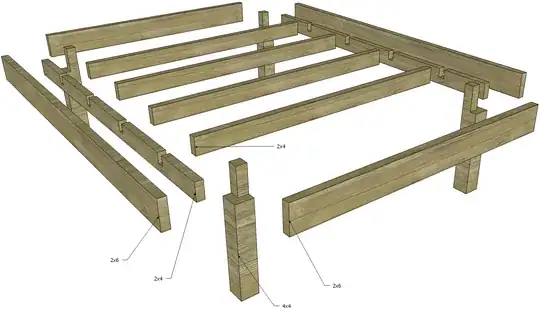
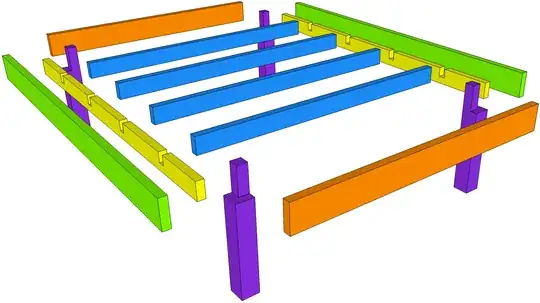
I mean the question generally, but right now I'm thinking about the various joints needed for the structure below (loft platform for king sized bed, basically slats on joists on 4x4s):

enter image description here

Tester101
  • 133,087
  • 80
  • 327
  • 617
LoftyGoals
  • 535
  • 6
  • 11
  • 21

3 Answers3

3

Before you consider the attachment mechanisms, you need to consider the structural design. There is a problem with the current version if it is intended to be load bearing.

A structure that is basically a vertical parallelogram is inherently unstable. The joints serve as pivot points and the top of the structure can effectively slide sideways and collapse.

A standard approach is to create a triangulation that prevents a sideways shift. This can be done with narrow structural members set on an angle or with a side panel attached at multple points or rigid attachment to at least two walls (or a combination of these items). Any of these techniques can prevents side shift.

In your design, you really need at least two non-opposite sides with this bracing, and preferably all four sides.

Once you do that, there are numerous techniques for attachment. A relatively easy one is the use of t-nuts

t-nut

Bolt holes are drilled through two members, a t-nut is placed on one side of the hole and a bolt and washer on the other. The t-nut is embedded in the wood and the bolt can be removed with a simple wrench.

bib
  • 33,975
  • 10
  • 68
  • 102
3

Last year I built a bed frame similar to this (mine wasn't so tall, and it was only a queen sized bed), and also had the goal of making it easy to disassemble. I achieved my goal, but after moving to a new house realized it wasn't a good choice. While moving, I found it was much easier to simply remove the legs, and carry the "platform" as a single piece.

I also found that the bed will spend more time assembled than disassembled, so it's a better goal to make the bed solid while assembled. Since building my bed frame I've gone back and made it less disassemble-able, in favor of making it more solid.

Final design

No sheathing

Exploded

Exploded in Color

  • The yellow braces are glued and screwed to the green rails from the inside.
  • The orange end caps are attached to the green rails with screws, using a pocket hole joinery.
  • The blue slats simply slide into the notches in the yellow braces, so no fasteners are used.
  • Finally, the purple legs are attached to the green rails using carriage bolts (the only visible fasteners).

I planned to install skirting around the perimeter, which would hide the carriage bolt heads. Unfortunately, I have yet to do it.

If this was much taller, I probably wouldn't notch the 4x4 legs. I would also add some cross bracing, or banding between the legs.

Tester101
  • 133,087
  • 80
  • 327
  • 617
0

Long ago, I built a set of elevated bunk beds. I ran the 4x4 posts up past the outside bed frame and then bolted the bed frame to the 4x4 frame with 3/8" carriage bolts. It was quite strong and easy to assemble and disassemble.

Eric Gunnerson
  • 2,977
  • 14
  • 10